Kitchen Integrity

All Posted Recipes:
I have tried it!
I like it!
(Or I tell you my stupid mistakes)
Showing posts with label tips. Show all posts

May 24, 2010

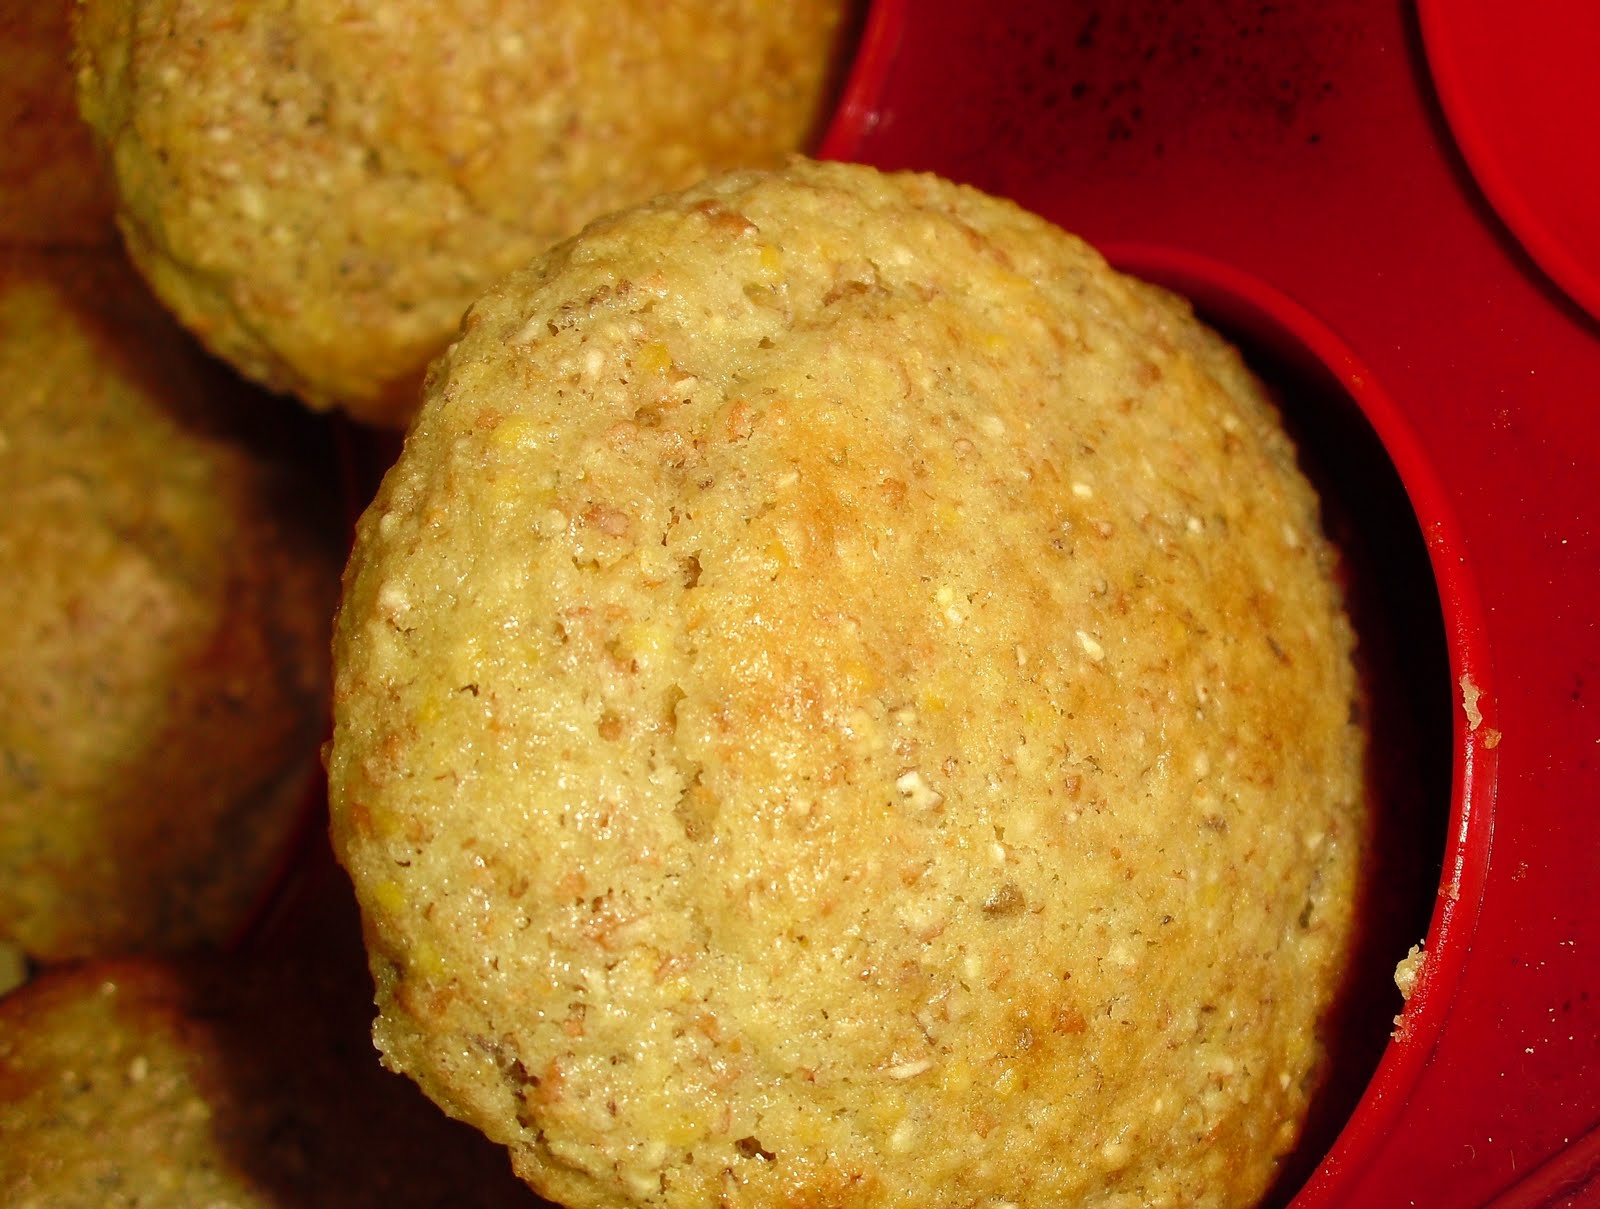
10 Grain Muffins


This is maybe really silly of me to post this recipe...because it comes on the package of 10 Grain cereal.
But I have to! What if you get a generic brand of 10 grain? Or what if...I don't know, what if you've never heard of it before?
Because basically, these were so very satisfying and tasty and perfect that I just have to share!
These muffins are almost the consistency of cornbread, and they're also packed with a really intensely nutritious flavor! Really, with these, nutrition DOES have a flavor. ("Yum, I'm getting healthy!")

10 Grain Muffins

1 large egg
1/2 cup sugar
1/3 cup butter
1 cup white flour
1 tsp. salt
1 tsp. baking powder
1 tsp. baking soda
1 cup 10 Grain Cereal
1 1/4 cup sour milk -or- buttermilk (I used sour*)

Mix 10 Grain Cereal and milk; allow to stand for 10 minutes while preheating oven (400) and assembling other ingredients. Cream sugar, butter and egg together.
Add dry ingredients and milk mixture. Stir only until mixed.
Spoon into greased muffin pan.
Bake at 400 for 15 minutes.

*TIP: if you don't have any sour milk, pour about 1 TBS lemon juice into your empty measuring cup and then fill with milk. Let it sit a couple minutes, stirring gently if necessary.
Milk is actually still okay to drink a week after the date on the jug, it just can't be sold that late. And this may be myth, but I think milks with more fat content go sour a little faster than skim milk.

PS: this is something my mom has always done: when the muffins come out of the oven, I use a knife (or tongs or whatever, who really cares) and turn the muffins sideways. This helps them cool a little faster and keeps them from over-baking in their still-hot pan. That's why the muffins are sideways in the picture. :)

Easy French Bread


This is from Michael's Aunt Lisa, and I've made it at least three times already. The title is honest! It really is easy! And delicious. Mmmm, my favorite french bread ever (and I've tried the genuine stuff, too).

Easy French Bread

2 1/2 cups warm water
2 TBS yeast

Put yeast in warm water in a LARGE bowl and let proof for about 5-10 minutes (it will probably only take 10 minutes if the yeast came straight from the freezer). The original recipe requests that you avoid stirring the yeast...but I can't resist! I always end up stirring it at the end of the ten minutes.

2 TBS sugar
1 TBS salt
2 TBS oil
6 cups flour

Add the sugar, salt and oil to the yeast water and mix. Add the flour cup by cup, mixing thoroughly. After 10 minutes, punch down the dough. Punch it down every ten minutes for an hour.

I like to make tally marks on a paper nearby and keep a kitchen timer handy. I don't have a kitchenaid or really anything comparable, so I do this perhaps a bit primitively... all I really need after mixing in the flour is a spatula, which I use both to scrape the sides of the bowl and punch down the dough throughout the hour.

Around the 4th or 5th punching, preheat the oven for 400* and grease a cookie sheet. I like using a stick of butter to grease it.
When the hour is up, spread just a little bit of oil on the countertop.

TIP: The reason I use oil instead of more flour is it keep the bread from becoming too dry. I also prefer its efficiency for keeping my hands from getting sticky.

Split the dough in two and shape into loaves.
NOTE: this recipe doesn't require any kneading. The punching took care of that. The punching also makes this a really dense bread, so it's very moist (dense is good).
Place on cookie sheet and brush with either milk or melted butter (I prefer butter). Sprinkle with sesame seeds if desired. Slit tops.

TIP: Because of the oil and the stretchiness of this bread, slitting the tops is hard even with a very sharp knife. I use my kitchen scissors-- hold them vertical. It's very fast and works so much better.

Bake for 30 minutes.


Also makes amazing french toast for breakfast the next morning, delicious garlic bread as a side for spaghetti, and even pretty decent grilled cheese sandwiches.

For cheat garlic bread, butter slices and sprinkle with Garlic Salt. If the bread isn't fresh from the oven, place the prepared slices on a cookie sheet in an oven either set on Broil or about 350* for only a minute or two. Sometimes I even leave the oven door open so I can better monitor the bread--it doesn't take long to toast it!

*when doing sticky/messy recipes, I tie my wedding ring to my apron strings. I've even written notes on those recipes to remind myself to do this--and especially to put it back on once I'm finished!*

This dough doesn't have to rise the full hour to be successful.

March 13, 2010

Eggs, Especially Scrambled

I know a lot of people have problems with eggs.
Gah, I mean the problem of cooking the eggs, obviously.

I've been blessed with the gift of egg-cookery and have only had a problem with them once (the first time I made breakfast for Michael, go figure). And I feel fine bragging about this because I still remember the time I completely ruined brownies. Just ask my sister Maddie. There were NOT edible, not even close. Nasty tar things.

Anyway, here are some things I've learned about eggs.

  • They will keep cooking even after they're removed from the pan! Don't be afraid to set them on a plate a little ahead of time. The heat's still working in them.
  • I have been told to never use high heat with eggs. But I'm impatient (and for the longest time, using lower heat always led to burning my eggs--yeah, who knows). So when I use high heat, I never stop stirring. Keep the eggs moving! They'll be done very quickly, so dump them on a plate as soon as you can.
  • MOST of the time (now that I've figured it out), I use medium heat. Put either a little slice of butter or cooking spray in your pan first. I like to use butter, because it's easier to tell when the pan is hot and ready. As soon as the butter is sizzling (don't let it brown), put your eggs in. Don't put them in any sooner than that.
  • When using medium heat to scramble your eggs, be attentive. You don't have to stir quite as vigorously as with high heat, but don't let the eggs sit in one spot for long. That makes them lump (and then they seem to cook harder, not as fluffy).
  • I don't like to premix my eggs. Not for scrambled eggs. I love the texture and color from tossing the eggs in as they are, not with the whites all mixed into the yolks. I think it "scrambles" better.
  • If you want creamier eggs, add a little milk. But don't use milk if you want your eggs more fluffy (of course it's a matter of opinion--I think fluffy is better).
  • When adding grated cheese (yum!), wait till the eggs seem to be nearing the point you'd call them "done," and then toss the cheese on. Stir it in a little, and once it's satisfactorily melted enough, toss your eggs on a plate.
  • I make the eggs last among the various breakfast items if I can help it. Hot eggs are infinitely better than cooled, and freshly hot eggs are much tastier (and a better texture) than eggs that have been sitting covered. If you must cover your eggs--since timing doesn't always happen right--put a paper towel over them and then cover with a plate. The paper towel absorbs the condensation from the heat so that your eggs won't get sweaty. Ew.
Now here are some basic egg tips--not so specific to scrambling:

  • Don't use dirty, cracked or leaking eggs. They may have become contaminated with germs and nasty stuff like that. It's just a smart idea to toss those.
  • ALWAYS check the eggs in the carton at the grocery store! When I finally cared to do that, I was amazed how many cartons had cracked eggs!
  • Turn the eggs so that the large end is up in the carton so they don't absorb refrigerator odors. I know, it sounds so weird. But they also last a little longer this way...for some reason. Eggs can be stored up to 5 weeks after the packing date.
  • If a piece of shell drops in when you crack your egg, use the larger shell piece to fish it out. It's the best thing to pierce through the yolk and white.
  • Raw egg whites can be stored in a tight container for up to 4 days (I like to put sticky notes on time-sensitive leftovers in my fridge with the date they must be used by--also a label of what it is if it looks strange!). You can also freeze egg whites in a freezer container for up to ONE YEAR!
  • Always wash hands, utensils and countertop after working with eggs. Treat them like meat in this way--don't share the utensils used on eggs for anything else.
  • Refrigerate cold/leftover eggs immediately (and reheat completely before using).
  • Hard-boiled eggs in their shells can be stored in the fridge for up to 7 days.
Oh dear. No. I just remembered one other time I had a problem cooking eggs...it was an egg casserole, and my pregnantness just thought it was the best idea ever to use hamburger since we had no sausage. My first serving was delicious. And then somehow the flavors all set in and I realized how disgusting it was... and I nearly barfed every time I looked at the dish. Or even thought of it. And seriously, that wasn't just my pregnantness--Michael felt the same way!

Orange Juice

Right, a recipe for orange juice. JUST kidding. But I thought I'd mention...

I do my orange juice in a blender (my smoothie-maker is the only blender I have, actually, but it works fantasticly). I love the froth of fresh orange juice, so this kind of creates the illusion that it's freshly squoze. Mmmm.

I mix barely-thawed orange juice (frozen concentrate from can) first with two cans of water to blend. After that's thoroughly mixed, I add one more can of water. Sometimes I like to crush ice with it, too.
This is not an Orange Julius. It's just orange juice, our breakfast staple. Michael adores it, and I only do if it's all frothy and fresh like this.

Oh, and...you might want to let it settle just a little before you start pouring or else the mouthful of foaminess will make you have to burp a lot. :| Heh...just thought I'd mention.

And guess what...did you know that a little glop of the frozen stuff is really tasty in your scrambled eggs? You don't notice an orangey flavor, really. It just zests up the eggs (and it can add color, too, which is needed once in a while when eggs just won't do their part). You can toss the glop in before you set to blending your juice! :)

March 3, 2010

Cake Tips

The first cake I remember making is for my little sister's 8th(ish) birthday. Somehow it turned out very, very rounded on the top, and the frosting looked like toothpaste. But she liked the little bears dancing around it, and it tasted good. So she forgave me.
The next cake: ugly. Sorry, but it just was. And it was for the same sister! Poor dear. The cake was a plain round one, but the decoration was such a disaster I was embarrassed to show it to anyone. I'd tried to write a message...and tried to do hearts...and I don't know what else I tried, but I wished I'd stopped trying.
The next? HUGE flowers. Nobody wanted to gag down those wads of frosting. And the colors were a little more garish than pastel.
The next: for a friend's son's birthday. I made a yellow cake from scratch...it smelled soooo good. But I made the mistake of starting late, so I had to rush with the decorating. :| Not a good idea! It was all rather monotone. Not too hideous, but not very exciting either. I just hoped the little boy was too young to care.

And then my son's 1st Birthday Cake... I "drew" a giraffe on the cake. It was cool. Finally. Cool, not ugly.

So, through all these cake experiences, I've gathered some handy tips!
  1. If you've outlined a picture and want to fill it in with frosting, use a decorating tip and make little dollops throughout the shape. Then use a little spreading knife to blend it in.
  2. If you're making a round cake or frosting any cake that is on its serving dish (rather than serve-able from its pan), slip some strips of wax paper or parchment paper or even tinfoil. Remove after frosting. This keeps the plate looking clean and pretty.
  3. To get a round cake out of the pan without ruining it: trace a circle from the pan on wax paper. Cut out the circle and place it on the bottom of the pan. Flour or spray the pan (sides AND bottom).
    Let the cake cool completely before attempting to remove it from the pan. Put a plate on top of the pan. While clasping the plate to the pan, flip the pan over. The cake will gently plop onto the plate. It is upside down now, so take your final plate (the one you want the cake served from) and place that on top, as centered as possible. Repeat the process of flipping the cake. Frost the top of this bottom layer, making sure to bring the frosting to the edges (don't worry about the sides yet).
    Repeat the process with the second layer, but when you are ready to flip it onto the bottom layer, spread your fingers over the second layer's edges...line up one side of the edge with the bottom layer, and gently lay it down from there. Now frost the top and sides.
  4. To frost: plop a large dollop in the center and gently spread from center to edges until layer is even.
  5. You can freeze a cake before frosting if you'd like. You can always brush a cake to get rid of excess crumblies before frosting, but freezing the cake ensures it will be sturdy and can withstand some more vigorous spreading of the frosting. ;) It might also make it easier for you to line up the second layer with the bottom layer.
  6. If you're doing a designer cake, definitely freeze it before you start cutting the shapes out.
Wow, was that exhausting? I kind of threw it out there all at once!